Repair EPS File With Manual Guide
EPS file are developed by Adobe Systems. It contains data describing image or graphics placed within another PostScript document. EPS file corrupts due to virus attack, low Disk Space and corrupt windows registry.
What is EPS File?
EPS stands for encapsulated postscript file. It is standardized graphic file format used for importing /exporting PostScript language files among applications in different environments. EPS file contain text, graphics, and images. It contains description of image/ graphics using page description language. The purpose of an EPS file is to be encapsulated in another PostScript language page description.

Extension used:
.eps or. epsf or. epsi
MIME Type:
application/postscript, application/eps, application/x-eps, image/eps, image/x-eps
Repair EPS File
Solution #
Troubleshooting Error : "This document may contain binary EPS files, which can cause the print job to fail. If the printer produces output, then the binary data did not interfere with printing. Do you want to print this document?"
Cause :
PostScript printer configuration contains modules which interpret binary data as commands. When binary data is interpreted as command, this causes failure of print job.
Method 1
Resave EPS file using other formats such as TIFF, PDF, PSD and other formats.
Method 2 :
Click OK to Test document printing
Click OK and send print job to printer/device.
Solution #
Resolve error "Could not open the file since PostScript instructions could not be analyzed" by following:
Method 1 to repair EPS file :
- Press Windows button and press Q.
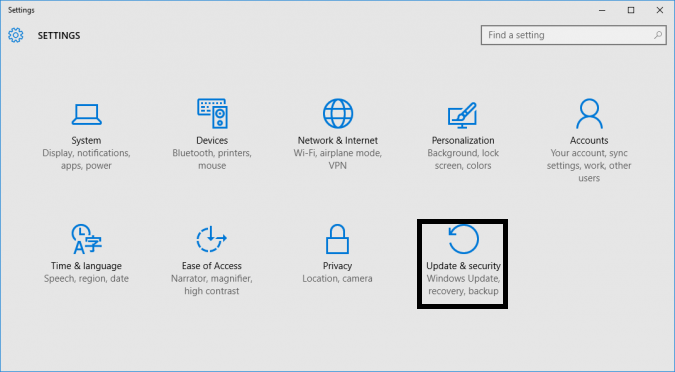
- In settings window select option "Update & security"
- Click "Recovery" option from left menu.
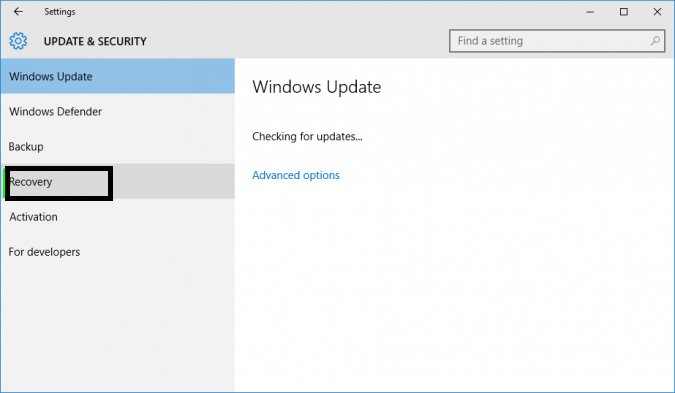
- In update & Security window choose option under Reset this PC "Get Started"

- Click option "Keep my files" or Remove everything as per requirement.
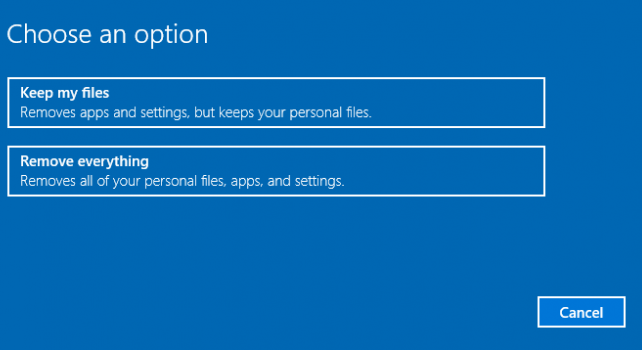
- Click Next.
Method 2 To Recover EPS file
Open file in text editor like notepad.
Solution # Registry Repair
Method 1
For Windows 7 & Vista
Back up Windows Registry
- Press window button and Q.
- Type in search run.

- Type in search window "regedit.exe"
- In Registry Editor window, search and click the registry key that user want to back up :
HKEY_CURRENT_USER\Software\Microsoft\Windows\CurrenVersion\Applets\Regedit
- Click File > Export.

- In Export Registry File window, select the location where user want to save the backup copy to, and then type a name for the backup file in the "File name" field.
- Click Save.
Restoring the Backup
- Press window button and Q.
- Type in search run.
- Type in search window "regedit.exe"
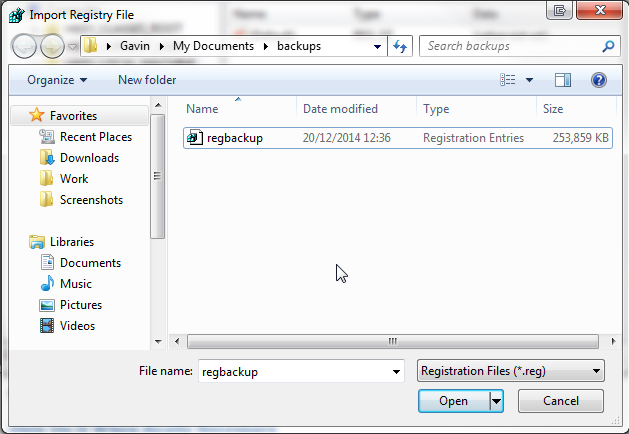
- click Files > Import.
- In the Import Registry window, browse the location where user the saved backup >> click Open.
Method 2 : Run inbuilt Windows Registry Checker Tool (Scanreg.exe) and fix corrupt EPS file
- Press windows and Q.
- In search enter command prompt.
- Choose command prompt option from menu and right click and select "Run as adminstrator".
- At the command prompt, type the following command, and press enter :
sfc /scannow

To scan the particular file use command :
Syntax : sfc /scanfile = path of the target file
sfc /scanfile=c:\windows\system32\kernel32.dll
Method 3: Softwares to repair windows registry and recover EPS file:
Trusted free registry cleaners that help users restore the corrupted registry with few clicks :
- CCleaner
- JetClean
- EasyCleaner
Solution #
Offline Softwares to repair EPS file :
Use Minitool power data recovery free edition can recover 1 GB data. It offers features :
Operating System Support :
Windows XP, Vista, Windows 7, Windows 8, Windows 8.1, Windows 10, Windows Server 2003, Windows Server 2008 (R2), Windows Server 2012r 200
File Type Support :
EPS, DOC/DOCX, XLS/XLSX, PPT/PPTX, PDF, HTML/HTM, JPG/JPEG, TIFF/TIF, PNG, BMP, GIF, PSD and other formats.
Solution #
Use antivirus to run full system scan to work in bug-free environment.
Solution #
Reinstall the application from trusted source to open EPS file .
Solution #
Use disk clean up utility to resolve problem of "Low Disk Space" :
Follow steps to rebuild EPS file:
- Press window button and Q.
- In search type "Disk Cleanup".

- Select the drive user want to clean .
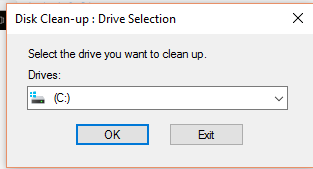
- Disk Cleanup dialog box opens up.
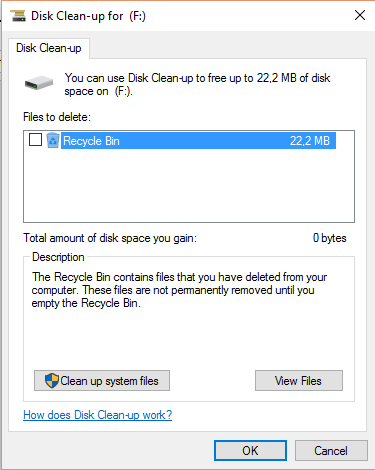
- Click "Clean up system files" to proceed.
![]()


